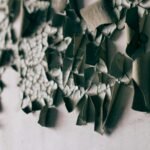
You stripped off that old wallpaper, desiring to find nicely painted, smooth walls, but instead, you are left with torn paper, dried glue, and uneven patches. Sound familiar? That’s where skim coating after wallpaper removal comes into play.
This procedure results in a smooth, paintable surface that removes years of texture and damage. The process is faster and cleaner than endless patching or sanding and gives walls that brand-new drywall look.
A skim coat, when done properly, is one of the best methods to repairing damaged walls and to regain a shiny finish in your house. This guide will explain when to skim a coat, how to prep, and the techniques professionals use to achieve seamless results.
When Should You Skim Coat After Wallpaper Removal?
One thing to note is that not all walls stripped of wallpaper need a full skim coating; however, many do. Consider applying a skim coat when:
- There’s widespread glue residue or torn drywall paper.
- Seams, gouges, or texture differences remain after scraping.
- You want a perfectly smooth, Level-4 or Level-5 finish for new paint.
In addition to that, as a simple rule of thumb, if the damage is isolated to a couple of plates, spot repair and priming could be sufficient. If the wall has a rough or patchy appearance to the touch, applying a full skim coat is the best way to guarantee uniformity.
You will find that, in the long run, skim coating following wallpaper removal is already consistent, but will also save you time later on. A skim coating after wallpaper removal provides an even and smooth surface compared to repainting old walls with imperfections that may become visible with light.
Prep — Cleaning, Glue Removal, And Priming
1. Remove Residual Adhesive And Loose Paper
Begin by washing the wall with warm water as well as a mild stripping solution to loosen up the leftover glue. Afterwards, gently scrape it using a broad knife until the surface feels clean and stable. Make sure the surface is fully peeled off and clean, as any remaining adhesive can lead to blister and/or peeling. The best practice is to rinse twice to guarantee every trace of glue is gone before moving forward.
2. Repair Major Damage Before Skim Coats
Remove any torn or loose drywall paper and fill in any gouges that are deep with a setting-type joint compound. This will allow your skim coat to stay intact without sinking or cracking. You can use a setting-type compound that has a quick setting time, or known as “hot mud”, so that you can apply multiple coats in one day. This is perfect for a busy schedule or when it is humid.
3. Seal And Prime Problem Areas
Prior to applying a skim coat, the exposed or patched areas should be spot primed for final touches with either a shellac-based or oil-based primer. This will seal any porous drywall and prevent bubbles of drying mud from forming underneath it. A good primer is essential for the next step (repairing damaged walls) to adhere and last for years.
Choosing The Right Compound And Tools
Picking the right materials determines how easy and smooth your skim coat will be.
Compound types
- Setting (hot) compounds, such as Durabond,d chemically harden in minutes and are perfect for base coats when you need fast layering.
- All-purpose or premixed compounds are easier to sand and ideal for finishing coats that need a feathered edge.
Essential tools for success
- Hawk and trowel or wide drywall knives (24–48”).
- Mixing drill and paddle for lump-free consistency.
- Sanding sponges or pole sanders for smoothing between coats.
- Dust-control sanding pads or wet-sanding systems for cleaner air quality.
Long finishing blades are a pro secret; they flatten wide areas and leave fewer ridges. Whether you’re DIY-ing or contracting out, investing in quality tools will make skim coating after wallpaper removal faster and more uniform.
Skim Coat Technique — Step-by-step Workflow
1. Mix And Apply First Coat
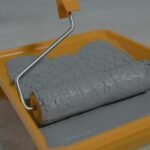
Blend your selected compound into a creamy consistency – a little less viscous than peanut butter. With a trowel or finishing blade, apply a thin, uniform layer top to bottom. Avoid overworking it – you are looking for coverage, not a perfect uniform coat on the first pass. Allow the compound to dry fully or set (for hot mud) before proceeding.
2. Knock Down High Spots And Apply Follow-up Coats
Before painting a second coat, gently scrape any ridges or raised lines. Use long, smooth strokes, slightly overlapping to maintain an even surface. Two or three thin coats will generally produce the best results. Avoid thick coats because they are harder to sand and can crack when dry.
3. Sanding, Dust Control And Final Prep
Once the final coat has dried, lightly sand the surface with fine-grit paper or a damp sponge to minimize dust. Wipe off residue and look at the surface with light directly above it. Spot-prime any areas that need it to assure a uniform sheen when painting. If properly accomplished, this procedure will create a dramatically transformed surface, providing refreshed life to rooms that felt and looked aged.
Troubleshooting And Common Mistakes
Even experienced DIYers hit a few bumps when repairing damaged walls. Here’s how to avoid them:
- Blistering — Leftover glue or missed primer causes bubbles—strip, prime, and start over.
- Cracking — Caused by applying too thick a coat or skipping drying time—use thin layers instead.
- Poor adhesion — Happens on unprimed drywall—always seals exposed gypsum before coating.
If your drywall paper is in such bad shape it can’t be salvaged, a full panel replacement may take less time and be less expensive than putting multiple skim coats on the damaged surface. It is worth the wait to peel back and replace than to build layers onto a compromised surface. Remember, patience and thin, even coats are still your best allies in achieving a professional result.
Time, Costs, And When To Call A Pro
Skim coating is an option for handy homeowners, but it can be arduous. It’s best to reckon several hours per room with the waiting cycles of drying and sanding. You can save a significant amount of money in smaller areas with Do It Yourself work, but if you’re skimming in large rooms and using a gloss finish, hiring a professional will become more cost-effective.
The price will be offset by the skimming compound used, surface area, and cost to hire laborers; however, even if they are out of your budget, professionals can complete the job faster and obtain a seamless result like no other. No matter if you do it yourself or hire the work out, your goal is to have smooth, flat walls ready for paint and light.
Smooth Finishes, Smarter Repairs
When performed correctly, skim coating following wallpaper removal is a real game-changer for damaged walls. It conceals wall imperfections, reinforces the drywall, and provides a smooth, paintable surface. Start by prepping a clean surface, the right product, and work your way slowly with each coat. Smooth walls aren’t a fluke; they come from an intentional, deliberate process.


