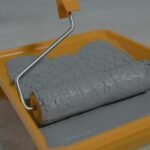
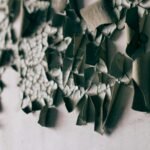
It’s not easy to have perfect walls forever because the climate always has other plans.
If you have a wall issue and want to fix it, skim coating provides you with a clear wall ready for painting by getting rid of bumpy drywall and patchy textures. However, skim coating in humidity or extreme temperatures can cause problems like slow drying, peeling, and even poor finishes. You have to consider the climate when skim coating to ensure it sticks and cures well. If you recently did a job by yourself and faced bubbles or cracks, chances are it was the weather. If you understand the relation between temperature and moisture during the process, you can avoid such mistakes and get the perfect finish.
What is Skim Coating and the Role of Climate in it?
Skim coating is a thin layer of joint compound used to smooth out cracks and rough spots on walls. But since it’s water-based, weather matters. Skim coating in humidity dries slowly, while heat can cause cracks. Cold temps? Poor adhesion. With the right knowledge on climate factors and when to work, one can get the best outcomes.
Effects of Humidity on Skim Coating
The most common weather conditions affecting skim coating are humidity.
1. Increased Drying Duration
More moisture in the air translates to the compound taking much longer to dry. This can offset the entirety of the project’s schedule by several hours, or in some cases, even days, particularly in the event that there is more than one coat to be applied.
If there is a rush to get the work finished, there is a high likelihood of moisture getting trapped underneath the surface, and as a result, bubbling, peeling, or mildew may form over time. Therefore, proper drying time between coats of skim coating in humid conditions is critical.
2. Poor Adhesion
When your walls are already damp due to humidity or moisture in the substrate (especially in basements or bathrooms), the joint compound might not adhere well. This can lead to sagging or slippage while you’re working, and eventual separation after it dries.
3. Increased Risk of Mold and Mildew
Because the compound stays wet longer in humid climates, you’re also increasing the window for mold growth, especially in poorly ventilated spaces.
To counter these issues when skim coating in humidity, always use dehumidifiers, fans, or air conditioning to regulate indoor conditions. The best level to keep humidity is below 50%.
Skim Coat and Effects of Temperature
Just like humidity, temperature also impacts skim coats equally.
1. Excessively Hot Weather or Rapid Drying
Under excessive hot temperatures, skim coats will tend to dry quicker, resulting in visible dry drag marks, cracks, or even shrinkage on the surface. In the worst case, the surface will harden before any attempt to smooth it.
When it comes to skim coats in hot weather, work in small sections. Step mist the surface lightly and apply during the cooler parts of the day. Achieving consistent results also works when using setting-type compounds as opposed to pre-mixed.
2. Cold Weather and Adhesion Problems
If the room is too cold (below 55°F or 13°C), the compound may not set correctly. It could remain soft for too long, not adhere well, or never fully cure.
Most manufacturers recommend a temperature range between 55°F and 85°F for optimal performance. Always check the product label for specific guidelines to minimize temperature impact on skim coat.
Best Practices for Skim Coating in Humid and Temperature-Sensitive Climates
Here are some must-follow rules to help you succeed when skim coating in humidity or challenging temperatures.
- Monitor Conditions- Use a hygrometer and thermometer to check humidity and temperature levels before and during your project.
- Prep Your Workspace- If you’re working in a humid area like a basement or coastal location, use a dehumidifier 24 hours before starting. If it’s too hot, work in the early morning or late evening.
- Use the Right Product- Consider using quick-setting joint compounds in humid environments. For temperature extremes, avoid pre-mixed muds unless conditions are stable.
- Ventilate Smartly- Good airflow can help with drying, but too much airflow (like fans directly on the wall) can cause premature drying or cracking.
- Plan for Time- Don’t rush the process. Skim coating in humidity means longer drying times, and cutting corners will show up in the final paint job.
- Multiple Thin Coats- Apply thin, even coats. Thick layers are more prone to issues in both hot and humid conditions.
Common Skim Coating Mistakes in Humid and Hot Environments
Even pros can run into problems when the climate isn’t right. Watch out for these common mistakes.
- Skipping Surface Prep- Dust, oil, or moisture on the surface can prevent the compound from bonding.
- Not Waiting Between Coats- Patience is key. Rushing between coats when skim coating in humidity leads to trapped moisture and bubbling.
- Using the Wrong Tools- In extreme temperatures, your tools matter. Use flexible knives for better control, and avoid overworking the compound in hot weather.
When to Reschedule Your Project
Sometimes, the climate simply isn’t cooperating. If you’re experiencing unusually high humidity (over 70%) or extreme heat, it may be better to wait. Remember, skim coating is an investment in your final finish. Poor conditions will only cost more time and money in the long run.
Finishing Strong – How to Get Perfect Skim Coating Results in Any Weather
Before starting your skim coating project, check the weather. Humidity slows drying and causes peeling. Heat makes it dry too fast and crack. Cold leads to soft, weak finishes. Whether DIY or pro, understanding skim coating in humidity and the temperature impact on skim coat helps you get smooth, lasting results. Right timing makes all the difference.


